
How to Seal the Gaps: Preventing Water Leaks Around Your Shower Door Frame
Water leaks around your shower door may seem like a minor nuisance, but over time they can cause serious damage to your bathroom flooring, subfloor, and even wall framing. Preventing water leaks around your shower door frame isn’t just about maintaining appearances; it’s about protecting your home’s structure, avoiding mold growth, and ensuring your shower enclosure performs efficiently. With the right techniques and materials, you can keep water exactly where it belongs.
Whether you live in a humid climate or a dry area like Dallas, moisture control is crucial. A water resistant shower enclosure does more than offer durability; it ensures peace of mind. Let’s walk through the most effective strategies for sealing gaps and preventing leaks around your shower door frame.
Understanding the Common Causes of Shower Door Leaks
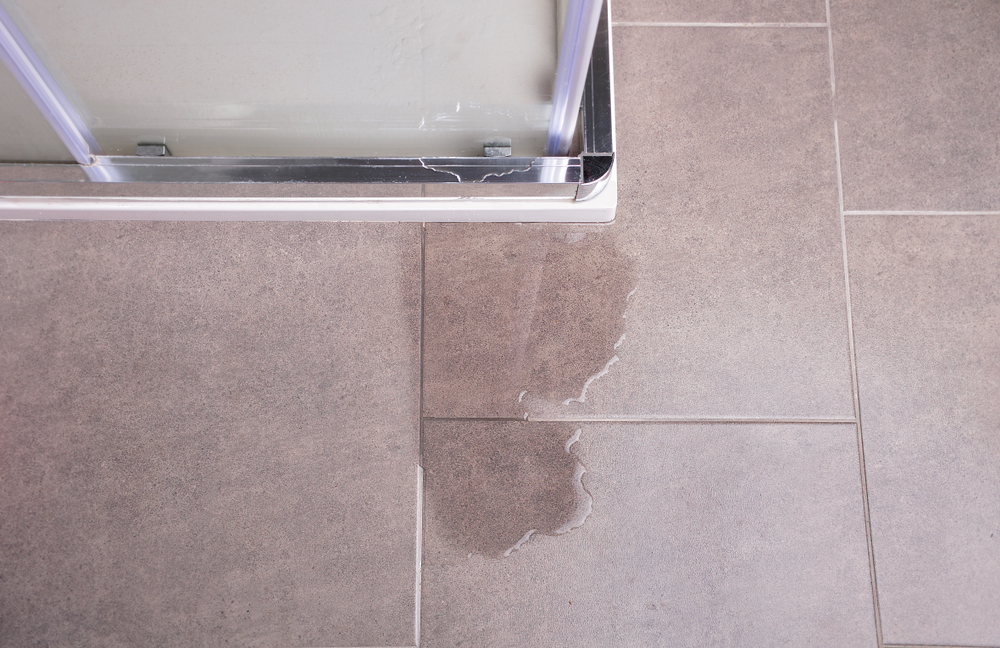
Before diving into solutions, it’s essential to understand where and why leaks occur. The first step in shower door leak prevention is identifying common weak points. Most framed shower doors are designed with channels and sweeps to guide water back into the shower pan. However, these can degrade or shift over time, leading to leaks.
One of the biggest culprits is poor installation. If the frame is not level or tightly secured, gaps can appear around the edges. Silicone sealant may be applied unevenly or may have deteriorated with age. Another issue arises from movement in the frame itself, especially if it’s not anchored well or has suffered wear over time. Finally, over-aggressive cleaning or harsh chemicals can degrade caulk and rubber seals, creating new vulnerabilities.
Understanding these issues makes it easier to target repairs that last. A comprehensive approach to leak prevention addresses both the initial quality of the seal and long-term maintenance.
Cleaning and Preparing the Surface for a Lasting Seal
No sealant or caulking job will be effective if applied to a dirty or wet surface. A common mistake in DIY repair is failing to thoroughly clean and dry the area before beginning. As part of any shower door caulking guide, surface preparation is critical.
Start by removing any old silicone or acrylic caulk with a plastic scraper or a specialized caulk remover tool. Be gentle, especially on delicate tile or fiberglass surfaces, but ensure you get every bit of the degraded material out of the joint. After this, clean the area with isopropyl alcohol to eliminate soap scum, mold, or mildew.
Dry the surface completely with a clean cloth and give it ample time to air dry. Caulk won’t bond properly if there is residual moisture. This step is often overlooked, especially in a busy household where people may be eager to use the shower again. However, giving the area time to completely dry ensures your sealant bonds securely.
Applying Caulk Like a Pro: A Shower Door Caulking Guide
Choosing the right type of caulk is just as important as applying it correctly. Silicone-based caulks are usually the best option for bathrooms because they are flexible, long-lasting, and resistant to mold. Acrylic caulks may be easier to apply and clean up, but they don’t offer the same level of water resistance.
Load your caulk gun and cut the tip of the tube at a 45-degree angle to allow for a narrow, controllable bead. Begin at one end of the frame and apply the caulk steadily along the entire edge where the frame meets the tile or shower base. Keep a damp finger or caulking tool handy to smooth the bead immediately after application. This will help the sealant penetrate any tiny gaps and leave a clean, professional finish.
Let the caulk cure according to the manufacturer’s instructions. Most silicone products require at least 24 hours to fully set before being exposed to moisture. Don’t rush this step. Avoid using the shower or touching the caulk until it has fully cured. Doing so ensures a watertight bond that can hold up for years.
Framed Shower Door Sealing Tips for Long-Term Performance
Sealing gaps around a framed shower door is not just a one-time task. To ensure lasting protection, it’s important to check your seals periodically and know what signs of failure to watch for. If you notice recurring puddles outside the shower, discolored caulk, or mold at the seams, these are indicators that your seal needs attention.
One effective strategy is to inspect the rubber sweep at the bottom of the shower door. Over time, these can warp or crack, leading to water escaping onto the bathroom floor. Replacing this component is easy and inexpensive, yet often overlooked. Similarly, inspect the metal track at the base of the door frame. If it becomes loose or clogged with debris, water may no longer be guided back into the drain area as intended.
Another tip is to regularly clean and ventilate the shower area. A water resistant shower enclosure in Dallas can still fall victim to mold and decay if ventilation is poor. Keep bathroom fans running during and after showers and leave the door slightly ajar to allow trapped moisture to escape.
Why Local Climate Matters in Shower Door Leak Prevention
Location plays a significant role in how your shower door performs over time. In a city like Dallas, where the climate is generally dry but can experience sudden humidity spikes, materials expand and contract more frequently than in milder coastal areas. This can cause caulk to pull away from surfaces or frame components to shift subtly, creating opportunities for leaks.
Investing in a water resistant shower enclosure designed for this kind of environment is essential. Look for options that feature reinforced corners, corrosion-resistant frames, and high-grade sealants. When sealing or repairing gaps, choose products labeled for high adhesion and elasticity to accommodate minor movement due to temperature shifts.
Contractors in Dallas are often familiar with these climate challenges and may recommend sealing products specifically rated for fluctuating temperatures. If hiring a professional installer, be sure to ask about the long-term performance of their materials and what kind of maintenance they recommend in your specific climate zone.
Conclusion
Sealing the gaps around your shower door frame is not only about aesthetics; it is a crucial step in protecting your home from long-term water damage. From surface preparation and precise caulking techniques to long-term maintenance and climate-specific considerations, shower door leak prevention requires a thoughtful approach. By applying these framed shower door sealing tips and following a reliable shower door caulking guide, you can create a water resistant shower enclosure that performs beautifully for years.
In places like Dallas, where temperature and humidity can shift quickly, taking extra steps to ensure seals remain intact is essential. Whether you’re building a new bathroom or maintaining an older one, attention to detail and the right sealing methods make all the difference. Keep water in its place and enjoy a worry-free showering experience.
Need a Glass Company in Texas?
Reflection Glass is a premier glass company specializing in residential and commercial glass solutions. We offer an extensive range of services to enhance the beauty and functionality of any space. For residential projects, we provide high-quality shower doors in various styles and finishes, along with door collections that elevate the aesthetics of homes. Our glass hardware options perfectly complement your design choices, ensuring seamless integration. With customizable shower door glass, we bring luxury and personalization to your bathroom. In addition, we cater to commercial properties with interior glass solutions for partitions and dividers, as well as exterior glass needs, including storefront windows and glass facades. Contact us today to learn more about what we can do for you!